
The Abbott FreeStyle Freedom Lite Blood Glucose Monitoring System offers comprehensive guidance for users․ This advanced system empowers individuals with detailed instructions, ensuring accurate and confident self-monitoring of blood glucose levels․
Accessing the user manual is crucial for understanding the system’s features and proper operation․ It provides a pathway to freedom and self-confidence in managing one’s health․
What is the Freestyle Freedom Lite?
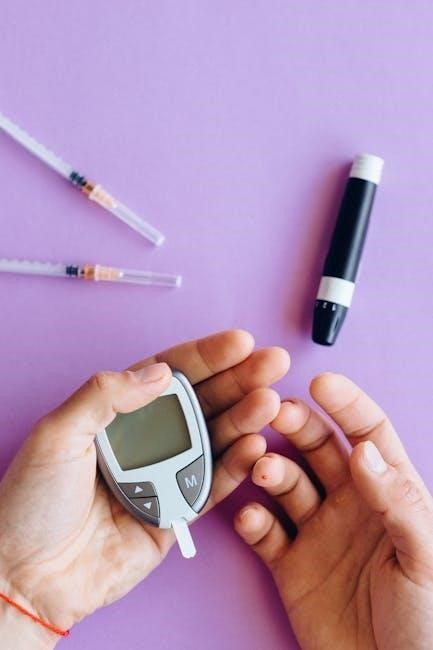
The Freestyle Freedom Lite is a compact and user-friendly blood glucose monitoring system designed for individuals managing diabetes․ It’s a pivotal tool for self-monitoring, providing crucial data to help maintain optimal health․ This system, detailed in the Abbott FreeStyle Freedom Lite Blood Glucose Monitoring System User Manual, prioritizes simplicity and accuracy․
Unlike some systems, the Freestyle Freedom Lite boasts “No Coding” technology, eliminating a potential source of error․ The owners booklet, available for download, explains how this feature contributes to reliable results․ It’s designed for virtually pain-free testing, enhancing user comfort and encouraging consistent monitoring․ The manual emphasizes understanding the system’s capabilities and limitations for effective diabetes management․ It’s a key component in empowering users to take control of their health journey, fostering both freedom and self-confidence․
Key Features and Benefits
The Freestyle Freedom Lite offers several key advantages, thoroughly explained within its user manual․ A primary benefit is its “No Coding” requirement, simplifying the testing process and minimizing potential errors․ This feature, highlighted in the owners booklet, ensures reliable results with each use․ The system is also designed for virtually pain-free testing, promoting consistent monitoring and user comfort․
Furthermore, the compact design enhances portability, allowing for discreet testing anywhere, anytime․ The manual details how to interpret results effectively, empowering users to make informed decisions about their health․ It fosters freedom and self-confidence in managing diabetes․ Accessing the PDF version of the manual provides comprehensive guidance, ensuring users fully leverage the system’s capabilities for optimal blood glucose control․
Intended Use
The Freestyle Freedom Lite Blood Glucose Monitoring System, as detailed in the user manual, is specifically intended for in-vitro diagnostic use․ This means it’s designed to measure glucose levels in whole blood samples obtained from individuals with diabetes․ The system aids in monitoring blood glucose concentrations at home, providing valuable data for managing the condition effectively․
The owners booklet emphasizes that the system is a tool to assist, not replace, professional medical advice․ Users should always consult with their healthcare provider regarding treatment plans and interpretation of results․ It’s intended for self-testing and should not be used for critical decisions requiring hospital-level laboratory accuracy․ Proper use, guided by the manual, is crucial for reliable readings and informed self-management․
System Components
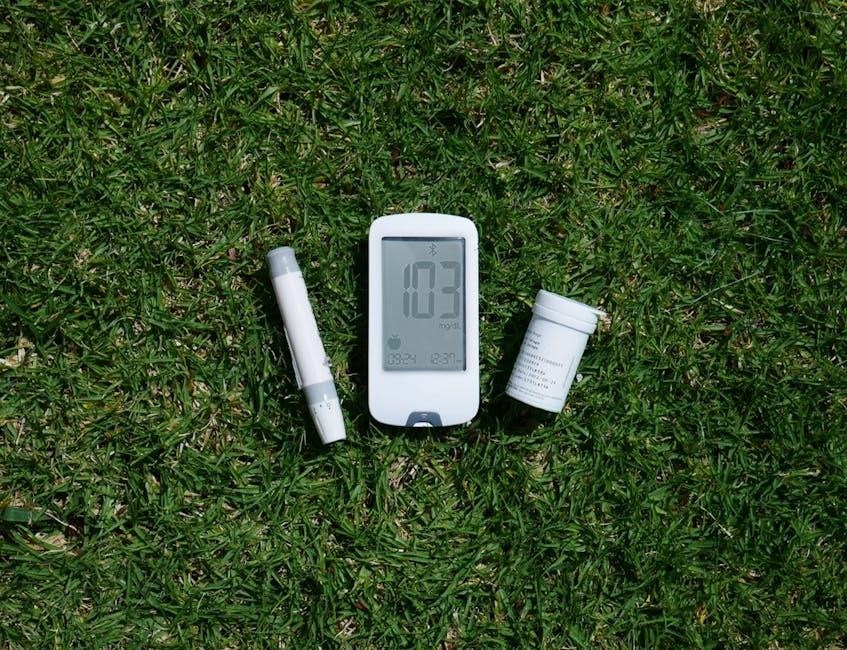
The Freestyle Freedom Lite system includes a meter, test strips, a lancing device, and lancets – all detailed within the comprehensive user manual for optimal use․
Meter Overview
The FreeStyle Freedom Lite meter is a compact, user-friendly device designed for accurate blood glucose monitoring․ As detailed in the user manual, the meter features a clear, easy-to-read display showing glucose results, along with important symbols indicating meter status and potential errors․ It’s designed for ‘no-coding’ convenience, eliminating the need for manual calibration with each new test strip box․
The meter’s small size makes it highly portable, allowing for discreet testing anywhere, anytime․ The user manual emphasizes the importance of understanding the button functions – typically including a power/test button and buttons for recalling memory and navigating menus․ It’s built for simplicity, aiming to empower users with straightforward operation and reliable readings․ Proper care, as outlined in the manual, ensures the longevity and accuracy of the meter․
Test Strip Information
FreeStyle Freedom Lite test strips are specifically designed for use with the FreeStyle Freedom Lite meter, ensuring accurate and reliable blood glucose readings․ The user manual stresses the importance of using only genuine Abbott test strips, as third-party strips may yield inaccurate results․ These strips feature Zipwick® technology, designed for fast and accurate blood sample drawing․
Proper storage of test strips, as detailed in the manual, is crucial for maintaining their integrity․ They should be stored in a cool, dry place, away from direct sunlight and heat․ Avoid touching the test area of the strip to prevent contamination․ The manual also clarifies the expiration date, advising against using expired strips․ Always check the packaging for the lot number and refer to the manual for any specific instructions related to that lot․
Lancing Device and Lancets
The FreeStyle Freedom Lite system utilizes a lancing device to obtain a small blood sample․ The user manual emphasizes the importance of using only sterile, single-use lancets with this device․ Adjusting the depth setting on the lancing device is crucial for a comfortable and effective test; the manual provides guidance on selecting the appropriate setting based on skin type․
Proper handling and disposal of lancets are paramount for safety․ Never reuse lancets, as this can lead to infection and inaccurate results․ The manual details safe disposal procedures, recommending the use of a sharps container․ Always replace the protective cap on the lancing device when not in use․ Regularly inspect the lancing device for any damage or malfunction, consulting the manual for troubleshooting steps․
Setting Up Your Meter
The user manual guides initial setup, including battery insertion and date/time configuration․ Understanding the meter display and its symbols is essential for accurate operation․
Inserting the Battery
Before first use, or when the meter displays a low battery indicator, you’ll need to insert a new battery․ The FreeStyle Freedom Lite typically requires a standard 3V CR2032 button cell battery․ Refer to your user manual for a detailed diagram illustrating the battery compartment location – usually on the back of the meter․
Carefully open the battery compartment cover, often by sliding or lifting a small latch․ Pay close attention to the battery polarity markings (+ and -) inside the compartment․ Insert the new battery, ensuring the positive (+) side faces up, aligning with the indicated markings․
Once the battery is correctly positioned, securely close the battery compartment cover until it clicks into place․ The meter should power on automatically․ If it doesn’t, double-check the battery’s orientation and ensure the compartment is fully closed․ Incorrect battery insertion can prevent the meter from functioning properly and may damage the device․
Setting the Date and Time
Accurate date and time settings are essential for proper data tracking and recall of your blood glucose readings․ Upon initial setup, or after a battery change, the FreeStyle Freedom Lite will likely prompt you to set the date and time․ Consult your user manual for specific instructions, as the process can vary slightly․
Typically, you’ll navigate through the meter’s menu using the buttons on the device․ You’ll adjust the year, month, and day sequentially, confirming each selection․ Then, you’ll set the hour and minute, often choosing between a 12-hour or 24-hour clock format․
Ensure the date and time are correct before finalizing the settings․ Incorrect settings can lead to inaccurate record-keeping and difficulty in interpreting your blood glucose trends over time․ Save the settings to complete the process․
Meter Display and Symbols
Understanding the FreeStyle Freedom Lite’s display and symbols is crucial for interpreting your blood glucose results and meter status․ The display clearly shows your blood glucose reading in milligrams per deciliter (mg/dL)․ Familiarize yourself with the various symbols that appear alongside the reading․
Common symbols include a battery indicator, indicating remaining battery life, and a test strip symbol, confirming proper strip insertion․ Error codes will also appear as symbols, signaling potential issues with the test or meter function – refer to the user manual’s troubleshooting section for explanations․
The meter may also display symbols related to meal markers or control solution testing․ Recognizing these symbols ensures accurate interpretation of your data and proper meter operation․
Performing a Blood Glucose Test
The FreeStyle Freedom Lite enables straightforward testing․ Prepare the lancing device, apply a blood sample to the test strip, and read your results quickly and accurately․
Preparing the Lancing Device
Before initiating a blood glucose test with the FreeStyle Freedom Lite, proper preparation of the lancing device is essential for a comfortable and accurate experience․ Begin by firmly inserting a fresh, sterile lancet into the lancing device, ensuring it clicks securely into place․
Adjust the depth setting on the lancing device according to your skin type and preference; start with a shallower setting and increase if insufficient blood is obtained․ Remember, shallower settings are generally suitable for thinner skin, while deeper settings may be necessary for thicker skin․
Cock the lancing device according to the manufacturer’s instructions, priming it for use․ Always use a new, sterile lancet for each test to prevent infection and ensure optimal performance․ Avoid reusing lancets, as this can dull the tip and increase discomfort․ Proper preparation minimizes pain and maximizes the reliability of your blood glucose readings․
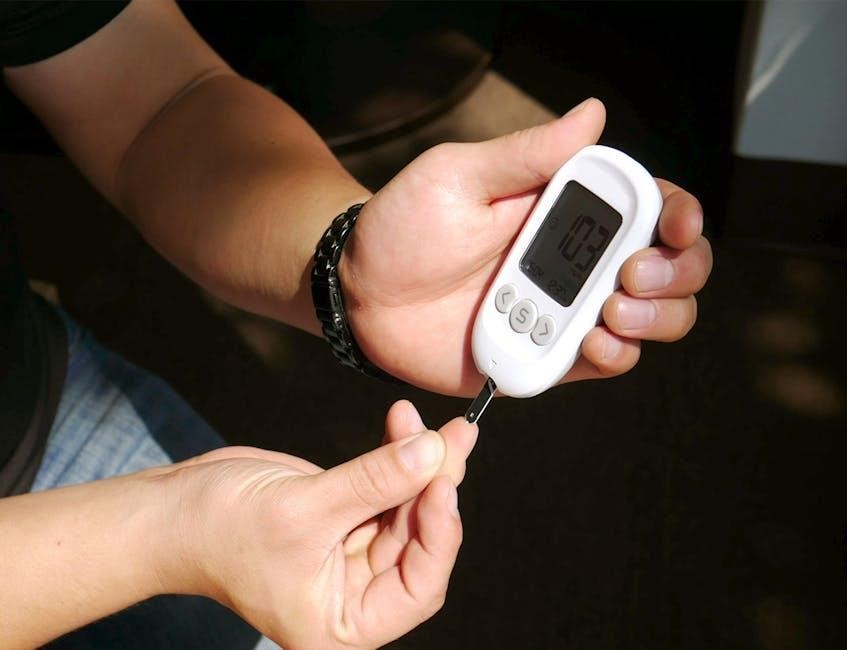
Applying a Blood Sample
Once the lancing device is prepared, gently press the device firmly against the side of your fingertip – avoid the center for less discomfort․ Press the release button on the lancing device to obtain a small drop of blood․ If the initial attempt doesn’t yield enough blood, gently massage the finger towards the puncture site, avoiding excessive squeezing which can dilute the sample․
Bring the test strip’s sample area into contact with the blood drop; the strip will automatically draw in the required amount of blood․ Ensure the sample fills the designated area on the test strip completely․ Avoid smearing the blood across the strip, as this can lead to inaccurate results․
Do not add any extra blood to the test strip after it has drawn in the initial sample․ A properly applied sample is crucial for accurate glucose monitoring․
Reading Your Results
After applying the blood sample, the Freestyle Freedom Lite meter will begin analyzing it automatically․ Within a few seconds, your blood glucose result will be displayed clearly on the meter’s screen․ The reading will be presented in milligrams per deciliter (mg/dL)․
Pay close attention to the meter display, noting the numerical value and any accompanying symbols․ These symbols may indicate if the result is within your target range, or if it’s flagged as high or low․ Familiarize yourself with the meter’s symbols as outlined in the manual․
Record your results immediately in a logbook or within the meter’s memory for tracking and review with your healthcare provider․
Understanding Your Results
Interpreting your blood glucose readings is vital for effective diabetes management․ Knowing your target range, recognizing high and low values, and understanding influencing factors are key․
Target Range
Establishing a personalized target range is a cornerstone of effective blood glucose management with the FreeStyle Freedom Lite․ Generally, for most individuals without diabetes, a fasting blood glucose level less than 100 mg/dL is considered normal․ After meals (postprandial), levels should ideally be less than 140 mg/dL two hours after eating․
However, individual target ranges are determined in consultation with a healthcare professional; Factors like age, overall health, presence of other medical conditions, and treatment plan all influence these goals․ Your doctor will help you define a range that’s appropriate for your specific needs․
Consistent monitoring using the FreeStyle Freedom Lite allows you to track your levels and understand how they respond to diet, exercise, and medication․ Staying within your target range minimizes the risk of both short-term discomfort and long-term complications associated with fluctuating blood sugar․
High and Low Readings
Understanding high and low blood glucose readings is vital when using the FreeStyle Freedom Lite․ A reading consistently above your target range (hyperglycemia) may cause increased thirst, frequent urination, and blurred vision․ Prolonged high levels can lead to serious health issues, requiring immediate medical attention․
Conversely, low blood glucose (hypoglycemia) – typically below 70 mg/dL – can manifest as shakiness, sweating, dizziness, and confusion․ Severe hypoglycemia can result in loss of consciousness․ Quick action is crucial; consume a fast-acting carbohydrate source like glucose tablets or juice․
Promptly address any readings outside your target range․ Document these occurrences, noting the time, potential causes (food, activity, medication), and any actions taken․ Share this information with your healthcare provider to refine your management plan and ensure optimal health outcomes․
Factors Affecting Blood Glucose Levels
Numerous factors influence your blood glucose readings beyond just food intake․ Physical activity significantly impacts levels; exercise generally lowers glucose, but intensity and duration matter․ Stress, illness (like a cold or flu), and even dehydration can elevate readings․
Medications, including insulin and oral diabetes drugs, play a crucial role․ Incorrect dosages or timing can cause fluctuations․ Hormonal changes, particularly in women during menstruation or pregnancy, also affect glucose control․
Meal composition – carbohydrates, fats, and proteins – impacts how quickly glucose rises․ Consistent meal timing and portion control are essential․ Keep a log of these factors alongside your readings to identify personal patterns and optimize your management strategy with your healthcare provider․
Memory and Data Management
The FreeStyle Freedom Lite allows recalling past test results, aiding in tracking trends․ It also calculates averages, providing valuable insights into glucose control over time․
Recalling Test Results
The FreeStyle Freedom Lite meter conveniently stores your blood glucose readings, allowing you to review your testing history․ Accessing these results is a vital component of effective diabetes management, enabling you to identify patterns and understand how your body responds to food, exercise, and medication․
To recall your test results, typically you’ll use the meter’s buttons to navigate through the memory․ The user manual provides specific step-by-step instructions tailored to your device․ You can usually scroll forward and backward to view previous readings, often displayed with the date and time they were taken․
Understanding how to access and interpret this stored data empowers you to make informed decisions about your health․ Regularly reviewing your results, alongside guidance from your healthcare professional, is key to maintaining optimal blood glucose control and overall well-being․
Average Calculation
The FreeStyle Freedom Lite meter offers a valuable feature: automatic average calculation․ This function computes your average blood glucose level over a specified period, typically 7, 14, or 30 days․ This provides a broader perspective on your glucose control than individual readings alone․
Calculating averages helps identify trends and assess the effectiveness of your diabetes management plan․ The user manual details precisely how to access and view these averages using the meter’s buttons․ It will guide you through selecting the desired time frame for the calculation․
Remember that averages are just one piece of the puzzle․ Discuss your average readings with your healthcare provider to gain personalized insights and adjust your treatment plan as needed․ Consistent monitoring and informed interpretation are crucial for optimal health․
Troubleshooting
The FreeStyle Freedom Lite manual addresses common issues, including error messages․ It provides solutions for typical problems, ensuring continued accurate monitoring and user confidence․
Error Messages
The FreeStyle Freedom Lite meter displays various error messages to indicate potential problems during testing․ Understanding these messages is crucial for accurate results and proper device function․ The user manual details each error code and provides specific troubleshooting steps․
Common error messages may include “E-1” indicating a test strip error – ensure proper insertion and check the expiration date․ “E-2” often signifies a sample application issue; re-test with a sufficient blood drop․ “E-3” can relate to internal meter errors, potentially requiring a system reset or contacting customer support․
The manual emphasizes that ignoring error messages can lead to inaccurate readings․ Always refer to the manual’s troubleshooting section before attempting further tests․ If errors persist, contacting Abbott customer service is recommended for further assistance and potential device evaluation․ Proper interpretation of these signals ensures reliable blood glucose monitoring․
Common Issues and Solutions
The FreeStyle Freedom Lite, while reliable, may occasionally present common issues․ Inconsistent results often stem from insufficient blood sample size; ensure a full, rounded drop is applied to the test strip․ Another frequent problem is difficulty obtaining a blood sample, which can be addressed by adjusting the lancing device depth or using a fresh lancet․
If the meter displays unexpected readings, verify the test strip hasn’t expired and is stored correctly․ Ensure hands are clean and dry before testing to avoid interference․ Error messages, as detailed in the manual, should be addressed promptly following the provided troubleshooting steps․
For persistent issues, consulting the user manual’s comprehensive guide or contacting Abbott customer support is recommended․ Regular meter cleaning, as outlined in the maintenance section, can also prevent many common problems, ensuring accurate and dependable glucose monitoring․
Maintenance and Care
Regular cleaning of the meter is vital for accuracy․ Proper test strip storage prevents degradation, and safe disposal of lancets and strips is essential for health․
Cleaning the Meter
Maintaining a clean meter is crucial for accurate blood glucose readings and preventing the spread of infection․ Before cleaning, ensure the meter is turned off․ Gently wipe the exterior of the meter with a soft, dry cloth to remove any dust or debris․
For more thorough cleaning, lightly dampen the cloth with isopropyl alcohol (70% concentration) and wipe the meter’s surface․ Avoid getting any liquid into the test strip port or other openings․ Never immerse the meter in water or any other liquid․
Allow the meter to air dry completely before inserting a test strip or using it again․ Regular cleaning, as part of your overall maintenance routine, will help ensure the longevity and reliable performance of your FreeStyle Freedom Lite blood glucose monitoring system․ Do not use abrasive cleaners or solvents, as these can damage the meter․
Test Strip Storage
Proper test strip storage is vital for accurate blood glucose results․ Always store your FreeStyle Freedom Lite test strips in their original vial, tightly closed, to protect them from moisture, heat, and light․ Exposure to these elements can compromise the strips’ integrity and lead to inaccurate readings․
Ideal storage conditions involve a cool, dry place, typically between 60°F and 86°F (16°C and 30°C)․ Avoid storing test strips in direct sunlight, in a bathroom, or near a heat source․ Do not transfer test strips to a different container, as this can introduce moisture and affect their performance․
Check the expiration date on the vial before each use․ Do not use expired test strips, as they may produce inaccurate results․ Discard any strips that appear damaged or discolored․ Following these guidelines will help ensure the reliability of your blood glucose monitoring․
Disposal of Used Lancets and Test Strips
Safe disposal of used lancets and test strips is crucial to prevent accidental needle sticks and maintain hygiene․ Used lancets are considered sharps and must be disposed of responsibly, following local regulations for sharps disposal․
Utilize an FDA-cleared sharps container for used lancets․ These containers are puncture-resistant and designed to safely contain sharp medical waste․ Do not throw used lancets into regular trash bins․ Once the sharps container is full, dispose of it according to your community’s guidelines – often through designated collection sites or medical waste programs․
Used test strips, while not considered sharps, should also be disposed of properly․ Place them in a sealed plastic bag before discarding them in your regular trash․ Always prioritize safety and responsible waste management when handling and disposing of these materials․